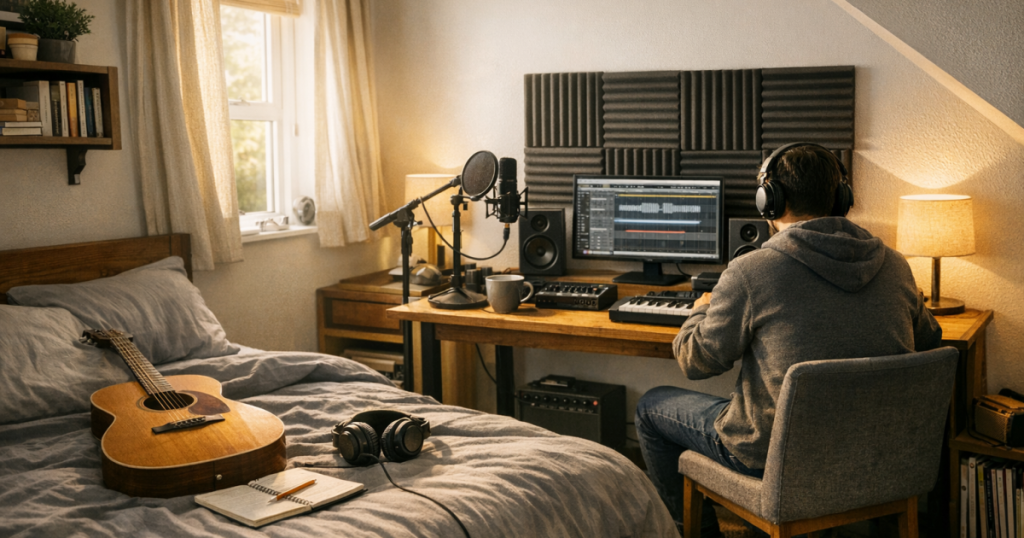
That first finished track rarely starts with a perfect room or a grand equipment list. It starts when an ordinary UK bedroom is made quiet enough, comfortable enough and simple enough to let one performance happen from beginning to end. The aim is not to recreate a commercial studio; it is to build a repeatable corner where songs, podcasts and voice projects can be captured, checked and finished.
A good beginner session is more like clearing a runway than building an airport. You remove the worst distractions, set up a short signal path, press record, and give the idea somewhere to land.
Main points
- A finished home recording begins with a clear project: one vocal, one guitar demo, one podcast episode or one voiceover, not a whole studio dream at once.
- The room matters, but comfort, low background noise and sensible microphone placement usually matter more than buying impressive gear too early.
- A simple setup can be enough: microphone, recording device or audio interface, closed-back headphones, a stable stand and a basic recording workflow.
- The session should end with an exported file, even if it is only a rough demo. Finishing teaches faster than endless testing.
Use those points as filters whenever a choice starts to feel bigger than it needs to be. If a new purchase, plug-in or room change does not help the next specific recording happen more calmly, it can usually wait. A beginner setup should remove friction: fewer cables to troubleshoot, fewer settings to second-guess, and fewer reasons to stop halfway through a promising take.
It helps to separate “quality” from “complexity”. A clean, steady vocal recorded with modest tools will usually beat an elaborate chain used nervously. The listener hears confidence, timing, intelligible words and a believable performance long before they notice whether the microphone was expensive. That does not mean gear is irrelevant; it means the best first upgrades are often the ones that make repeatable recording easier.
- If you keep clipping or recording too quietly, focus on input level and distance before changing microphone.
- If every take sounds roomy, try a different position and softer surroundings before adding more processing.
- If you avoid recording because setup takes too long, simplify the desk so one cable, one stand and one project template are ready to go.
- If performances feel tense, lower the monitoring level, warm up first, and record full passes rather than chasing tiny fixes immediately.
Think of the first few sessions as gathering evidence. After two or three finished files, patterns become obvious: the room is noisy at certain times, the chair creaks, the headphone mix is too loud, or the microphone stand keeps drifting. Those are useful discoveries, not failures. Each one gives you a practical next step, and practical steps are how a home recording corner quietly becomes dependable.
Start with the thing you actually want to finish
The easiest way to get lost is to start with gear rather than a result. A songwriter needs a different first session from a podcaster, and a voice artist needs different habits from someone layering guitars and harmonies. Before plugging anything in, name the small finished thing you want: a one-take acoustic demo, a two-minute podcast pilot, a clean spoken intro, or a guide vocal for a song.
That decision shapes the whole session. A podcast pilot needs consistent speech and a quiet chair more than dramatic room tone. A vocal demo needs a performance that feels alive, with enough headphone balance to stay in tune and in time. A guitar-and-vocal sketch needs a layout that lets you play naturally without twisting towards the microphone like you are defusing a bomb.
Choose the quietest usable corner, not the prettiest one
Bedrooms can work well because they are usually furnished. Curtains, duvets, clothes, rugs and books can help reduce obvious reflections, although they do not turn the room into a professionally treated space. Avoid the barest corner, the middle of an empty wall, and anywhere next to a noisy window, radiator or computer fan.
Try this quick placement test before recording properly: stand in three possible positions and speak or sing the same line at the same volume. Listen back on headphones. You are listening for boxiness, fluttery echoes, traffic rumble and harsh reflections. The winner is not always the neatest-looking spot; it is the place where the voice feels the least trapped by the room.
For many UK homes, the realistic solution is not soundproofing. It is scheduling and compromise: recording vocals before the washing machine goes on, choosing softer performances late at night, closing doors, and using the most absorbent part of the room when neighbours or housemates are nearby.
Build a simple capture chain
Beginners often imagine a recording chain as something mysterious, but the basic route is easy to understand: sound goes into a microphone, the signal reaches your computer or recorder, and you monitor what is happening through headphones. The fewer moving parts you add at first, the easier it is to spot mistakes.
For voice and podcast work, a USB microphone can be the shortest route into recording. For singers, guitarists and anyone likely to try different microphones later, an XLR microphone with a USB audio interface gives more room to grow. If you are trying to work out which route suits your goal, the Beginner Home Studio Setup Finder is a useful way to narrow the options without getting dragged into advanced spec sheets too early.
If you do choose an interface route, a compact model such as the Focusrite Scarlett Solo is the kind of beginner-friendly format many solo recordists compare when they only need to capture one source at a time. The important point is not the brand name on the desk; it is whether the setup matches the session you are actually running.
Make monitoring boringly reliable
Headphones are not glamorous, but they keep a small-room session under control. Closed-back studio headphones help you hear the backing track while reducing spill into the microphone compared with playing audio through speakers. Keep the headphone level comfortable and practical: loud enough to perform confidently, not so loud that you fight the mic or tire your ears.
Do not judge a first vocal or podcast take through laptop speakers from across the room. Listen on headphones for three things: whether the words are clear, whether the level stays reasonably consistent, and whether the background noise becomes distracting when nobody is speaking. If those three are acceptable, you are already closer to a finished piece than many abandoned first sessions.
Run the session like a musician, not a lab technician
Testing is useful, but too much testing drains the life out of the take. Give yourself a short setup ritual: open the project, check the microphone input, record ten seconds, listen back, adjust once, then begin. If you change five things after every take, you will never know what helped.
For songs, record a guide take first, even if it is imperfect. It gives the session shape. Then capture the main vocal or instrument in complete passes rather than stopping every time a line wobbles. For podcasts and voice projects, record a short warm-up paragraph before the real script. Your voice often settles after the first minute, and the warm-up gives you a noise sample to compare against later.
A dedicated broadcast-style microphone such as the Shure MV7+ Podcast Microphone can make sense for creators focused on speech, but technique still matters: stay at a steady distance, speak across the microphone rather than wandering around it, and use a stand that does not wobble every time you move.
Turn a rough take into something finished
Finishing does not mean pretending the recording is perfect. It means making a usable version: trimmed start and end, obvious mistakes removed, volume checked, and the file exported with a clear name. A finished bedroom demo can be a private reference, a collaboration file, a podcast pilot or a voice sample. It does not have to be the final master of your life.
Use a simple edit pass. Remove long silences, tidy accidental bumps, and choose the best complete performance before reaching for heavy processing. Beginners often add plug-ins to solve problems that could be fixed by moving the microphone, lowering the input level, or doing one calmer take. Editing should protect the performance, not sand away the reason it felt exciting.
Things readers ask
Can a bedroom recording sound good enough to share?
Yes, if the performance is strong, the room noise is controlled and the recording is clear enough for the listener. Bedroom recordings may not have the polish of a commercial studio, but songs, podcasts and voice projects can absolutely begin at home and develop from there.
Should I treat the room before buying any gear?
Start with free room choices first: position, timing, curtains, bedding, rugs and microphone distance. If you keep hearing the same reflection or boxy tone after those tests, then consider renter-friendly treatment or better stands and placement before making a big upgrade.
How many takes should I record?
For beginners, three complete takes is a healthy starting point. Take one warms you up, take two often has the best balance of focus and feeling, and take three gives you a backup without turning the session into a marathon.
Why it matters
The first real win is not owning a studio-shaped room. It is proving that your home can support a creative habit. Once you have finished one small recording, the next session feels less mysterious: you know where to stand, what to switch on, how loud to record, and when to stop fiddling and perform.
That is how home recording becomes part of ordinary life. A corner of a bedroom becomes the place where the chorus finally gets captured, the podcast idea becomes a pilot, and the voice project stops living only in your notes app. Keep the setup simple, keep the session short, and let finished work teach you what to improve next.